Adding a Host to Monitor
In this tutorial you will add an Ubuntu host to monitor to the Nagios server we have made above.
Nagios Server IP : 192.168.1.101
Ubuntu Host IP : 192.168.1.102
Ubuntu Host IP : 192.168.1.102
Step 1 - Connect to ubuntu host
ssh root@192.168.1.102
Step 2 - Install NRPE Service
sudo apt-get install nagios-nrpe-server nagios-plugins
Step 3 - Configure NRPE
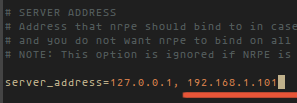
After the installation is complete, edit the nrpe file /etc/nagios/nrpe.cfg:
vim /etc/nagios/nrpe.cfg
... and add Nagios Server IP 192.168.1.101 to the server_address.
Step 4 - Restart NRPE
/etc/init.d/nagios-nrpe-server restart
DAFTARKAN CLIENT HOST DI SERVER :
Please connect to the Nagios server:
ssh root@192.168.1.101
Then create a new file for the host configuration in /usr/local/nagios/etc/servers/.
vim /usr/local/nagios/etc/servers/ubuntu_host.cfg
Add the following lines:
# Ubuntu Host configuration file

define host {
        use                          linux-server
        host_name                    ubuntu_host
        alias                        Ubuntu Host
        address                      192.168.1.102 #Ubuntu host IP
        register                     1
}

define service {
      host_name                       ubuntu_host
      service_description             PING
      check_command                   check_ping!100.0,20%!500.0,60%
      max_check_attempts              2
      check_interval                  2
      retry_interval                  2
      check_period                    24x7
      check_freshness                 1
      contact_groups                  admins
      notification_interval           2
      notification_period             24x7
      notifications_enabled           1
      register                        1
}

define service {
      host_name                       ubuntu_host
      service_description             Check Users
      check_command        check_local_users!20!50
      max_check_attempts              2
      check_interval                  2
      retry_interval                  2
      check_period                    24x7
      check_freshness                 1
      contact_groups                  admins
      notification_interval           2
      notification_period             24x7
      notifications_enabled           1
      register                        1
}

define service {
      host_name                       ubuntu_host
      service_description             Local Disk
      check_command                   check_local_disk!20%!10%!/
      max_check_attempts              2
      check_interval                  2
      retry_interval                  2
      check_period                    24x7
      check_freshness                 1
      contact_groups                  admins
      notification_interval           2
      notification_period             24x7
      notifications_enabled           1
      register                        1
}

define service {
      host_name                       ubuntu_host
      service_description             Check SSH
      check_command                   check_ssh
      max_check_attempts              2
      check_interval                  2
      retry_interval                  2
      check_period                    24x7
      check_freshness                 1
      contact_groups                  admins
      notification_interval           2
      notification_period             24x7
      notifications_enabled           1
      register                        1
}
You can find many check_command in /usr/local/nagios/etc/objects/commands.cfg file. See there if you want to add more services like DHCP, POP etc.
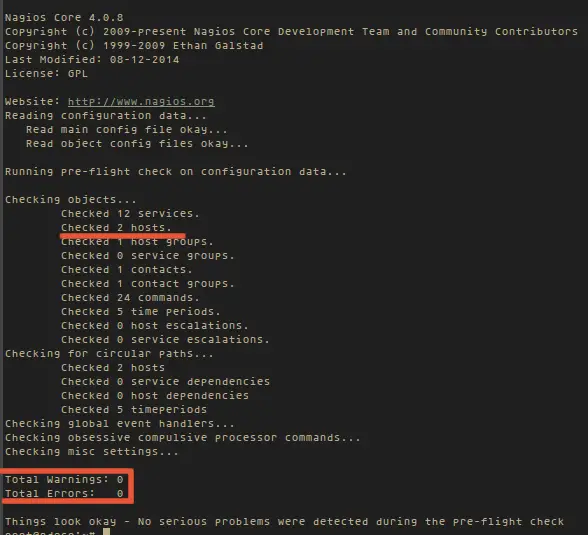
And now check the configuration:
/usr/local/nagios/bin/nagios -v /usr/local/nagios/etc/nagios.cfg
... to see if the configuration is correct.
Restart all services
On the Ubuntu Host start NRPE Service:
/etc/init.d/nagios-nrpe-server restart
... and on the Nagios server, start Apache and Nagios:
/etc/init.d/apache2 restart
/etc/init.d/nagios restart
/etc/init.d/nagios restart
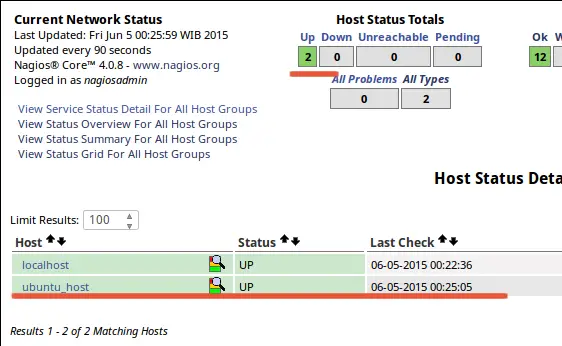
Testing Ubuntu Host
Open the Nagios server from the browser and see the ubuntu_host being monitored.
Conclusion
Nagios is an open source application for monitoring a system. Nagios has been widely used because of the ease of configuration. Nagios in support by various plugins, and you can even create your own plugins. Look here for more informations.
Reff:
https://www.howtoforge.com/tutorial/how-to-install-nagios-on-ubuntu-15-04/
Tidak ada komentar:
Posting Komentar